
Yashica IR Conversion — Part 2: Streamlining the Build
Redesigned internals, a custom lens mount, and STL files for subscribers.

Hey all,
I’ve been deep into camera building lately (I’ve got three different builds on the go right now!) and wanted to give you a quick update on the Yashica Electro IR conversion project. My goal with this build has been to streamline the design into something clean, repeatable, and easy to work with.
Lens Assembly
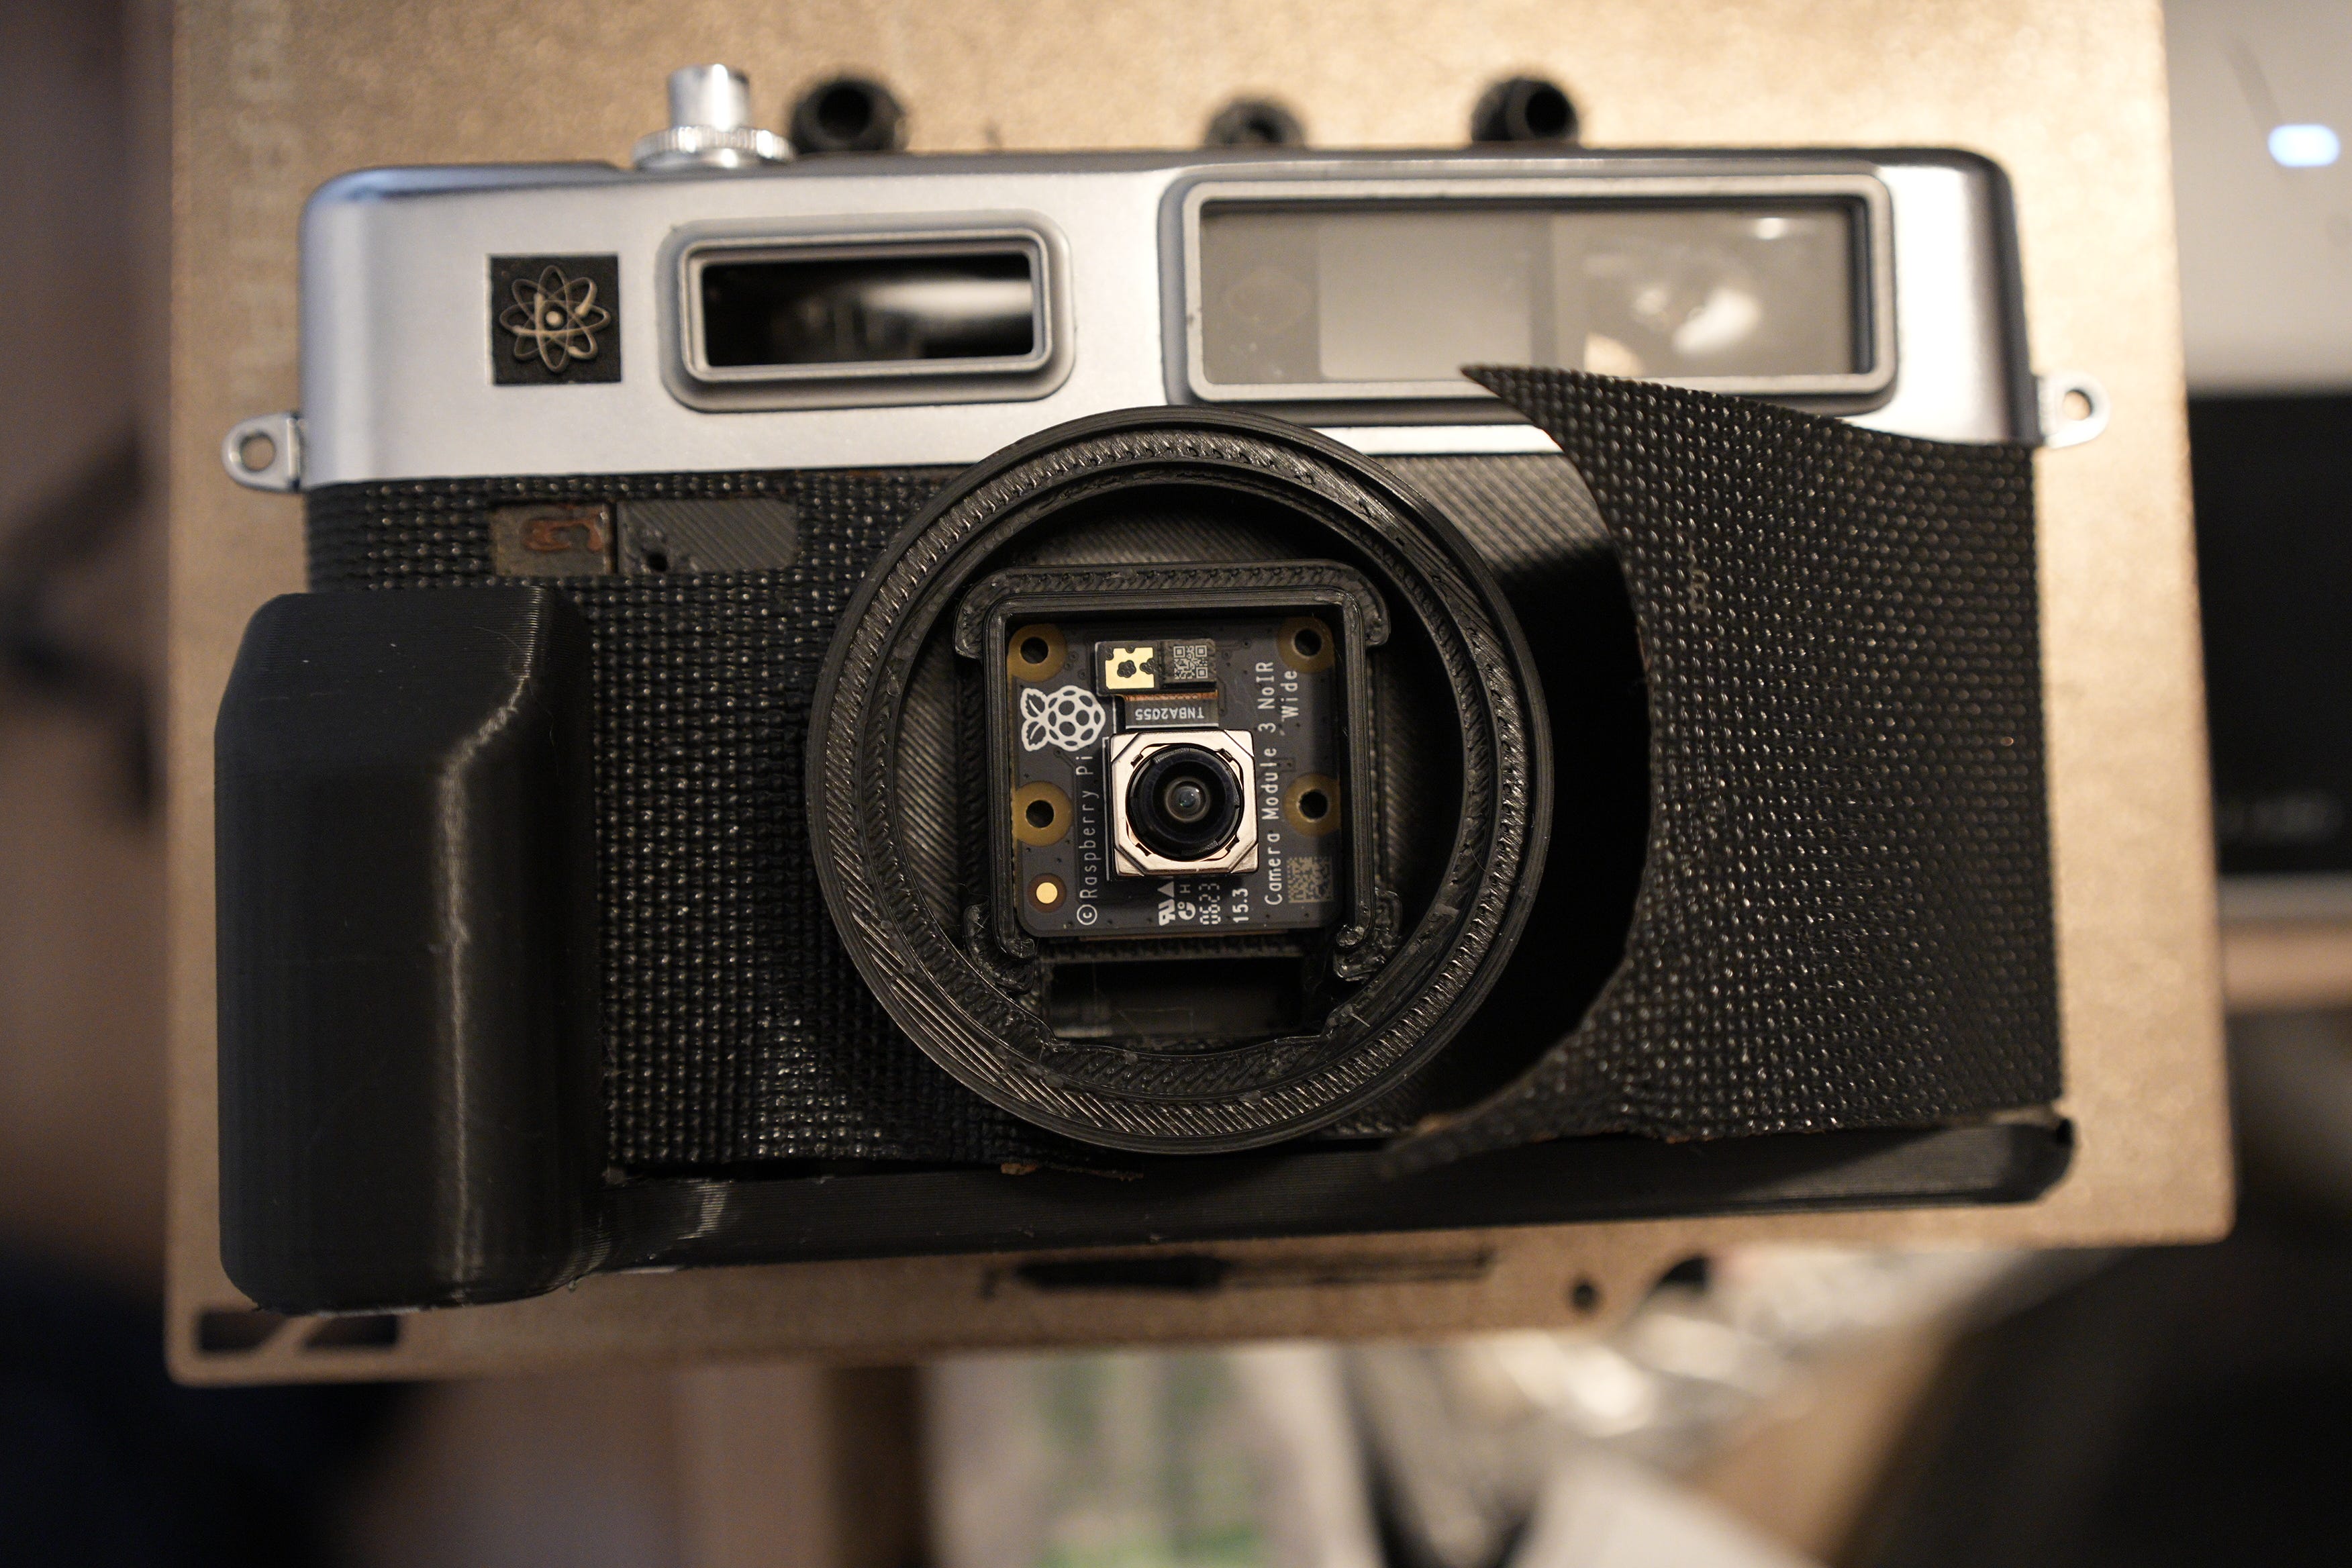
Instead of adapting the original metal lens plate, I decided to design a fully 3D-printed mount. This gave me the flexibility to integrate a lens mount that includes filter threads for the Raspberry Pi camera module — much cleaner and easier to replicate across builds.

Internals
For the internals, I wanted a more elegant and stable way to mount everything. So I removed the bottom plate and replaced it with a 3D-printed grip, which also houses the Raspberry Pi and battery. This keeps everything stable, and saves a ton of space inside the body.


That’s it for this update!
If you want access to my working STL files for the 3D-printed parts, paid subscribers can download them below.
Keep reading with a 7-day free trial
Subscribe to Camera Hacks by Malcolm-Jay to keep reading this post and get 7 days of free access to the full post archives.