


IR Camera Build
A Digital Infrared Camera in a Yashica Film Body

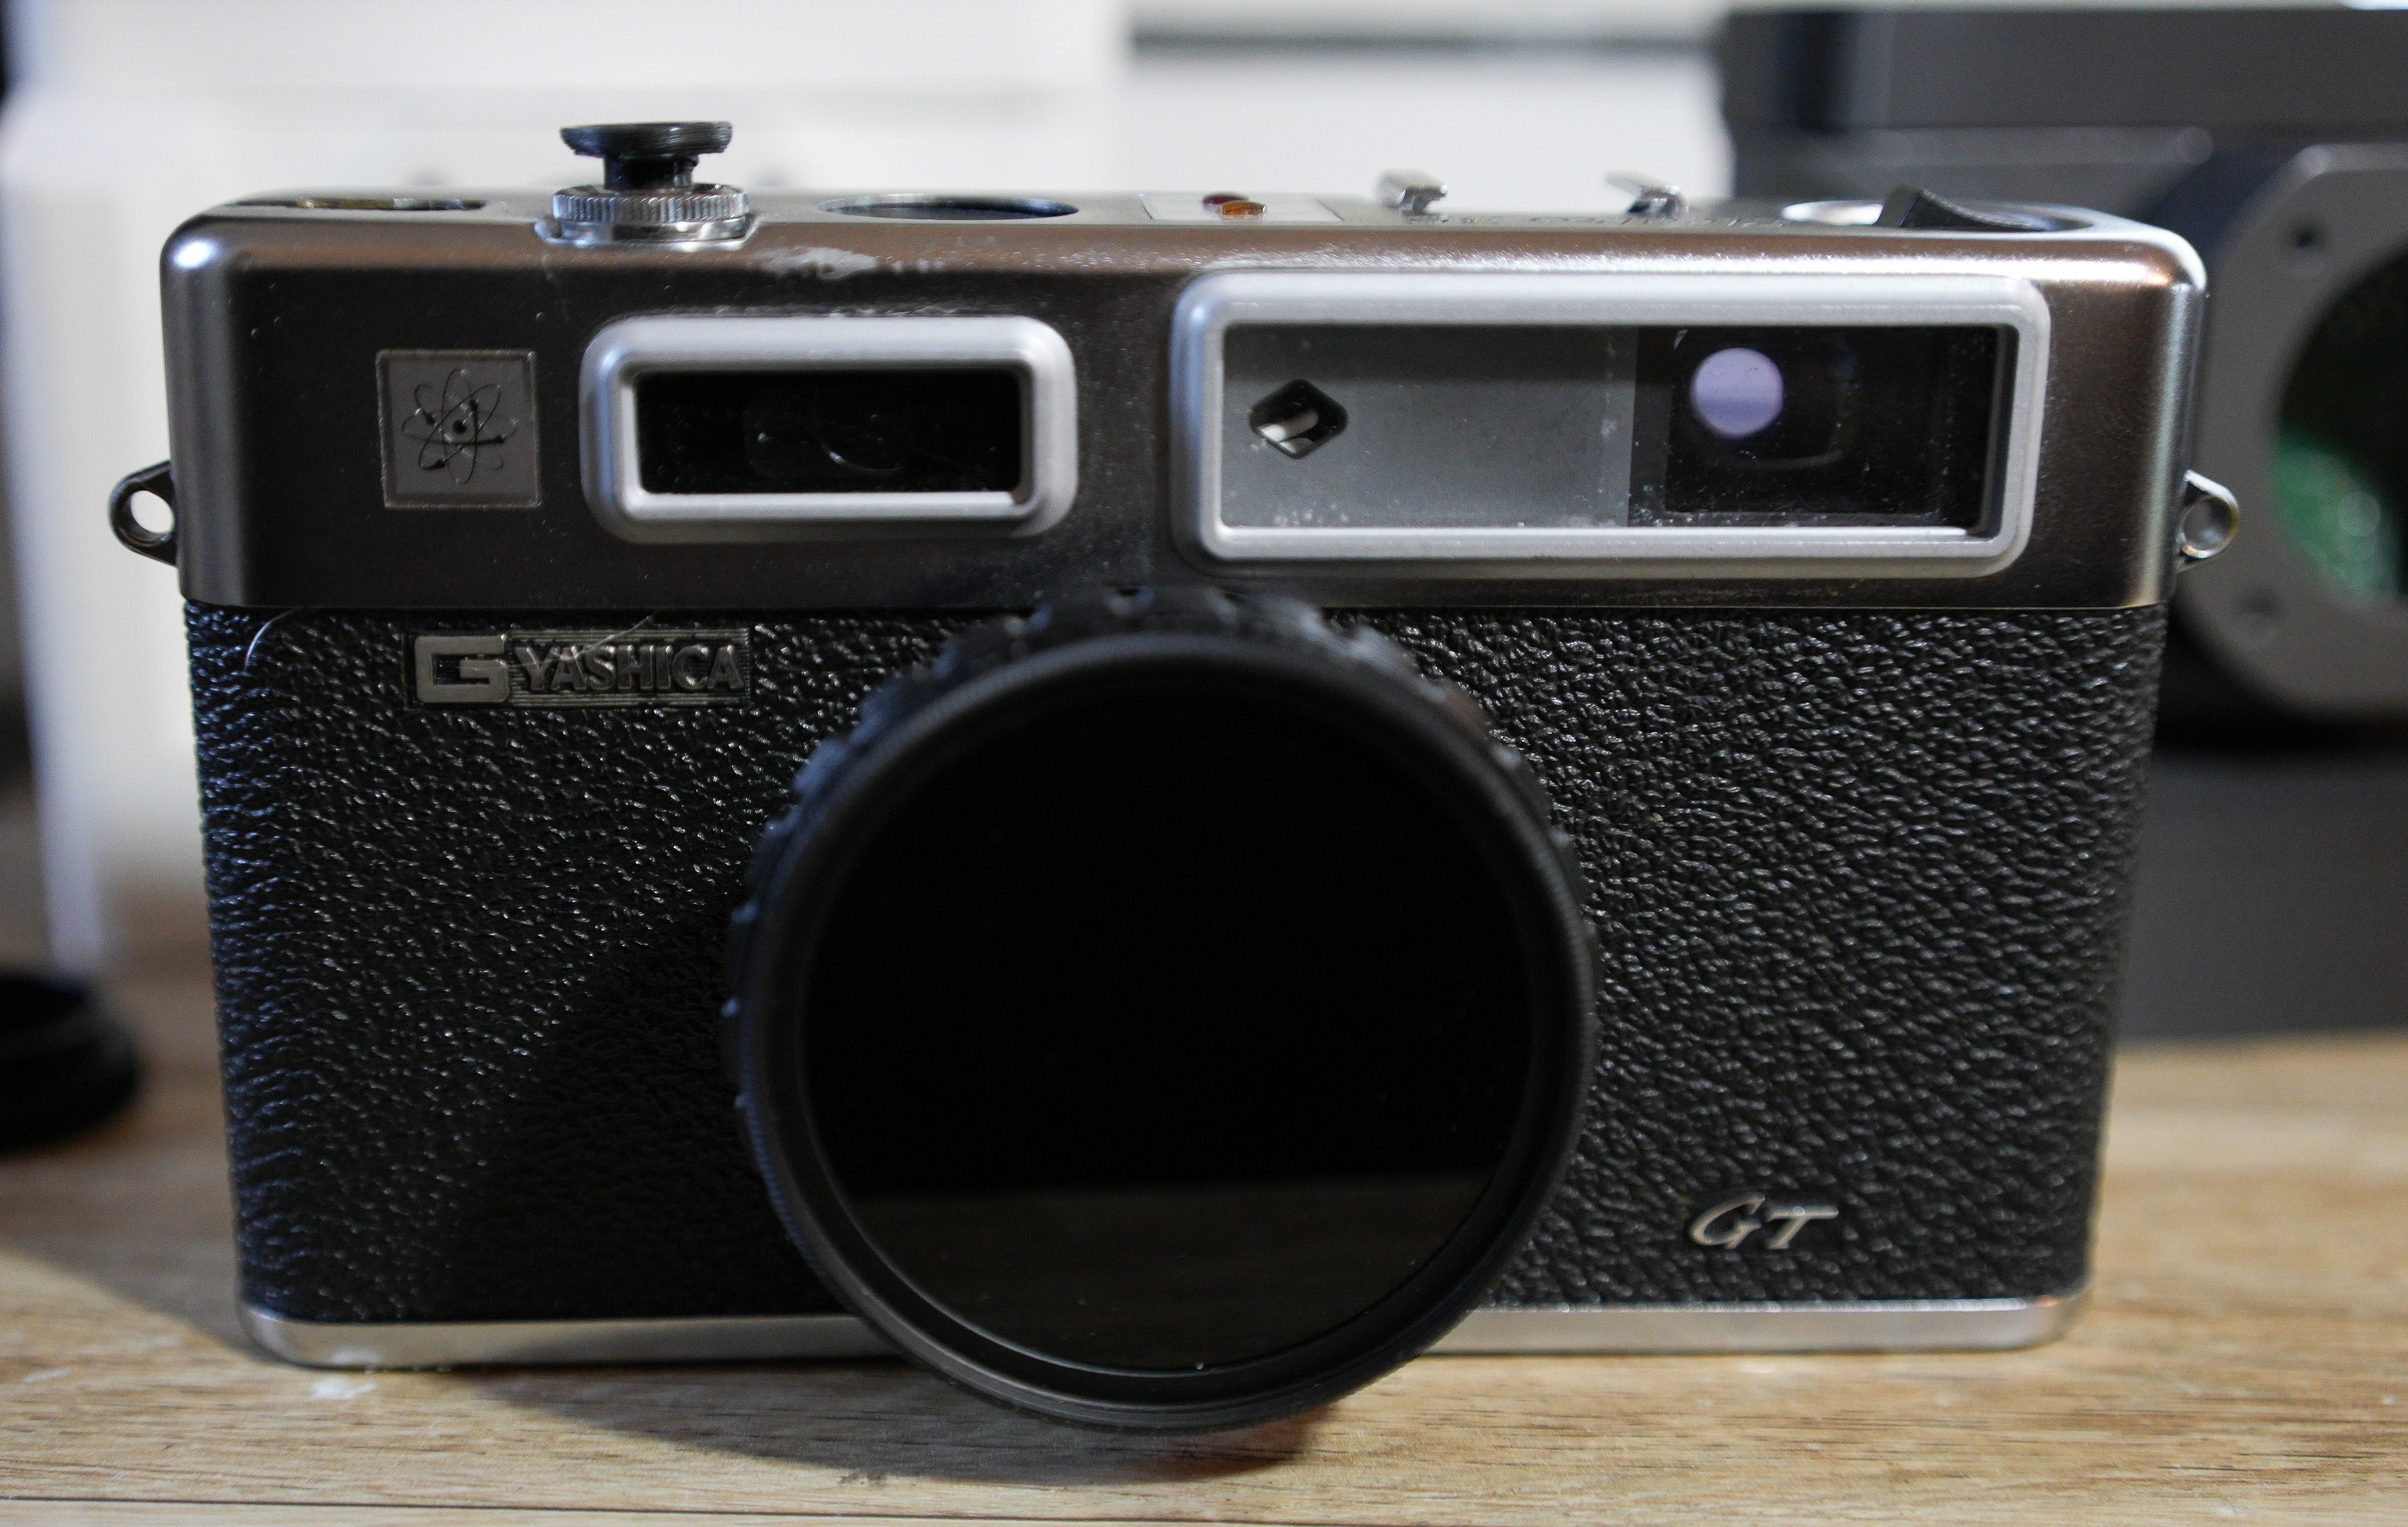
I built a camera using a Yashica Electro 35 film body, a Raspberry Pi Zero 2W, and the NOIR Pi Camera 3. The result? A compact infrared point-and-shoot with no screen—just optical composition and digital capture.
How It Works
1. Power On
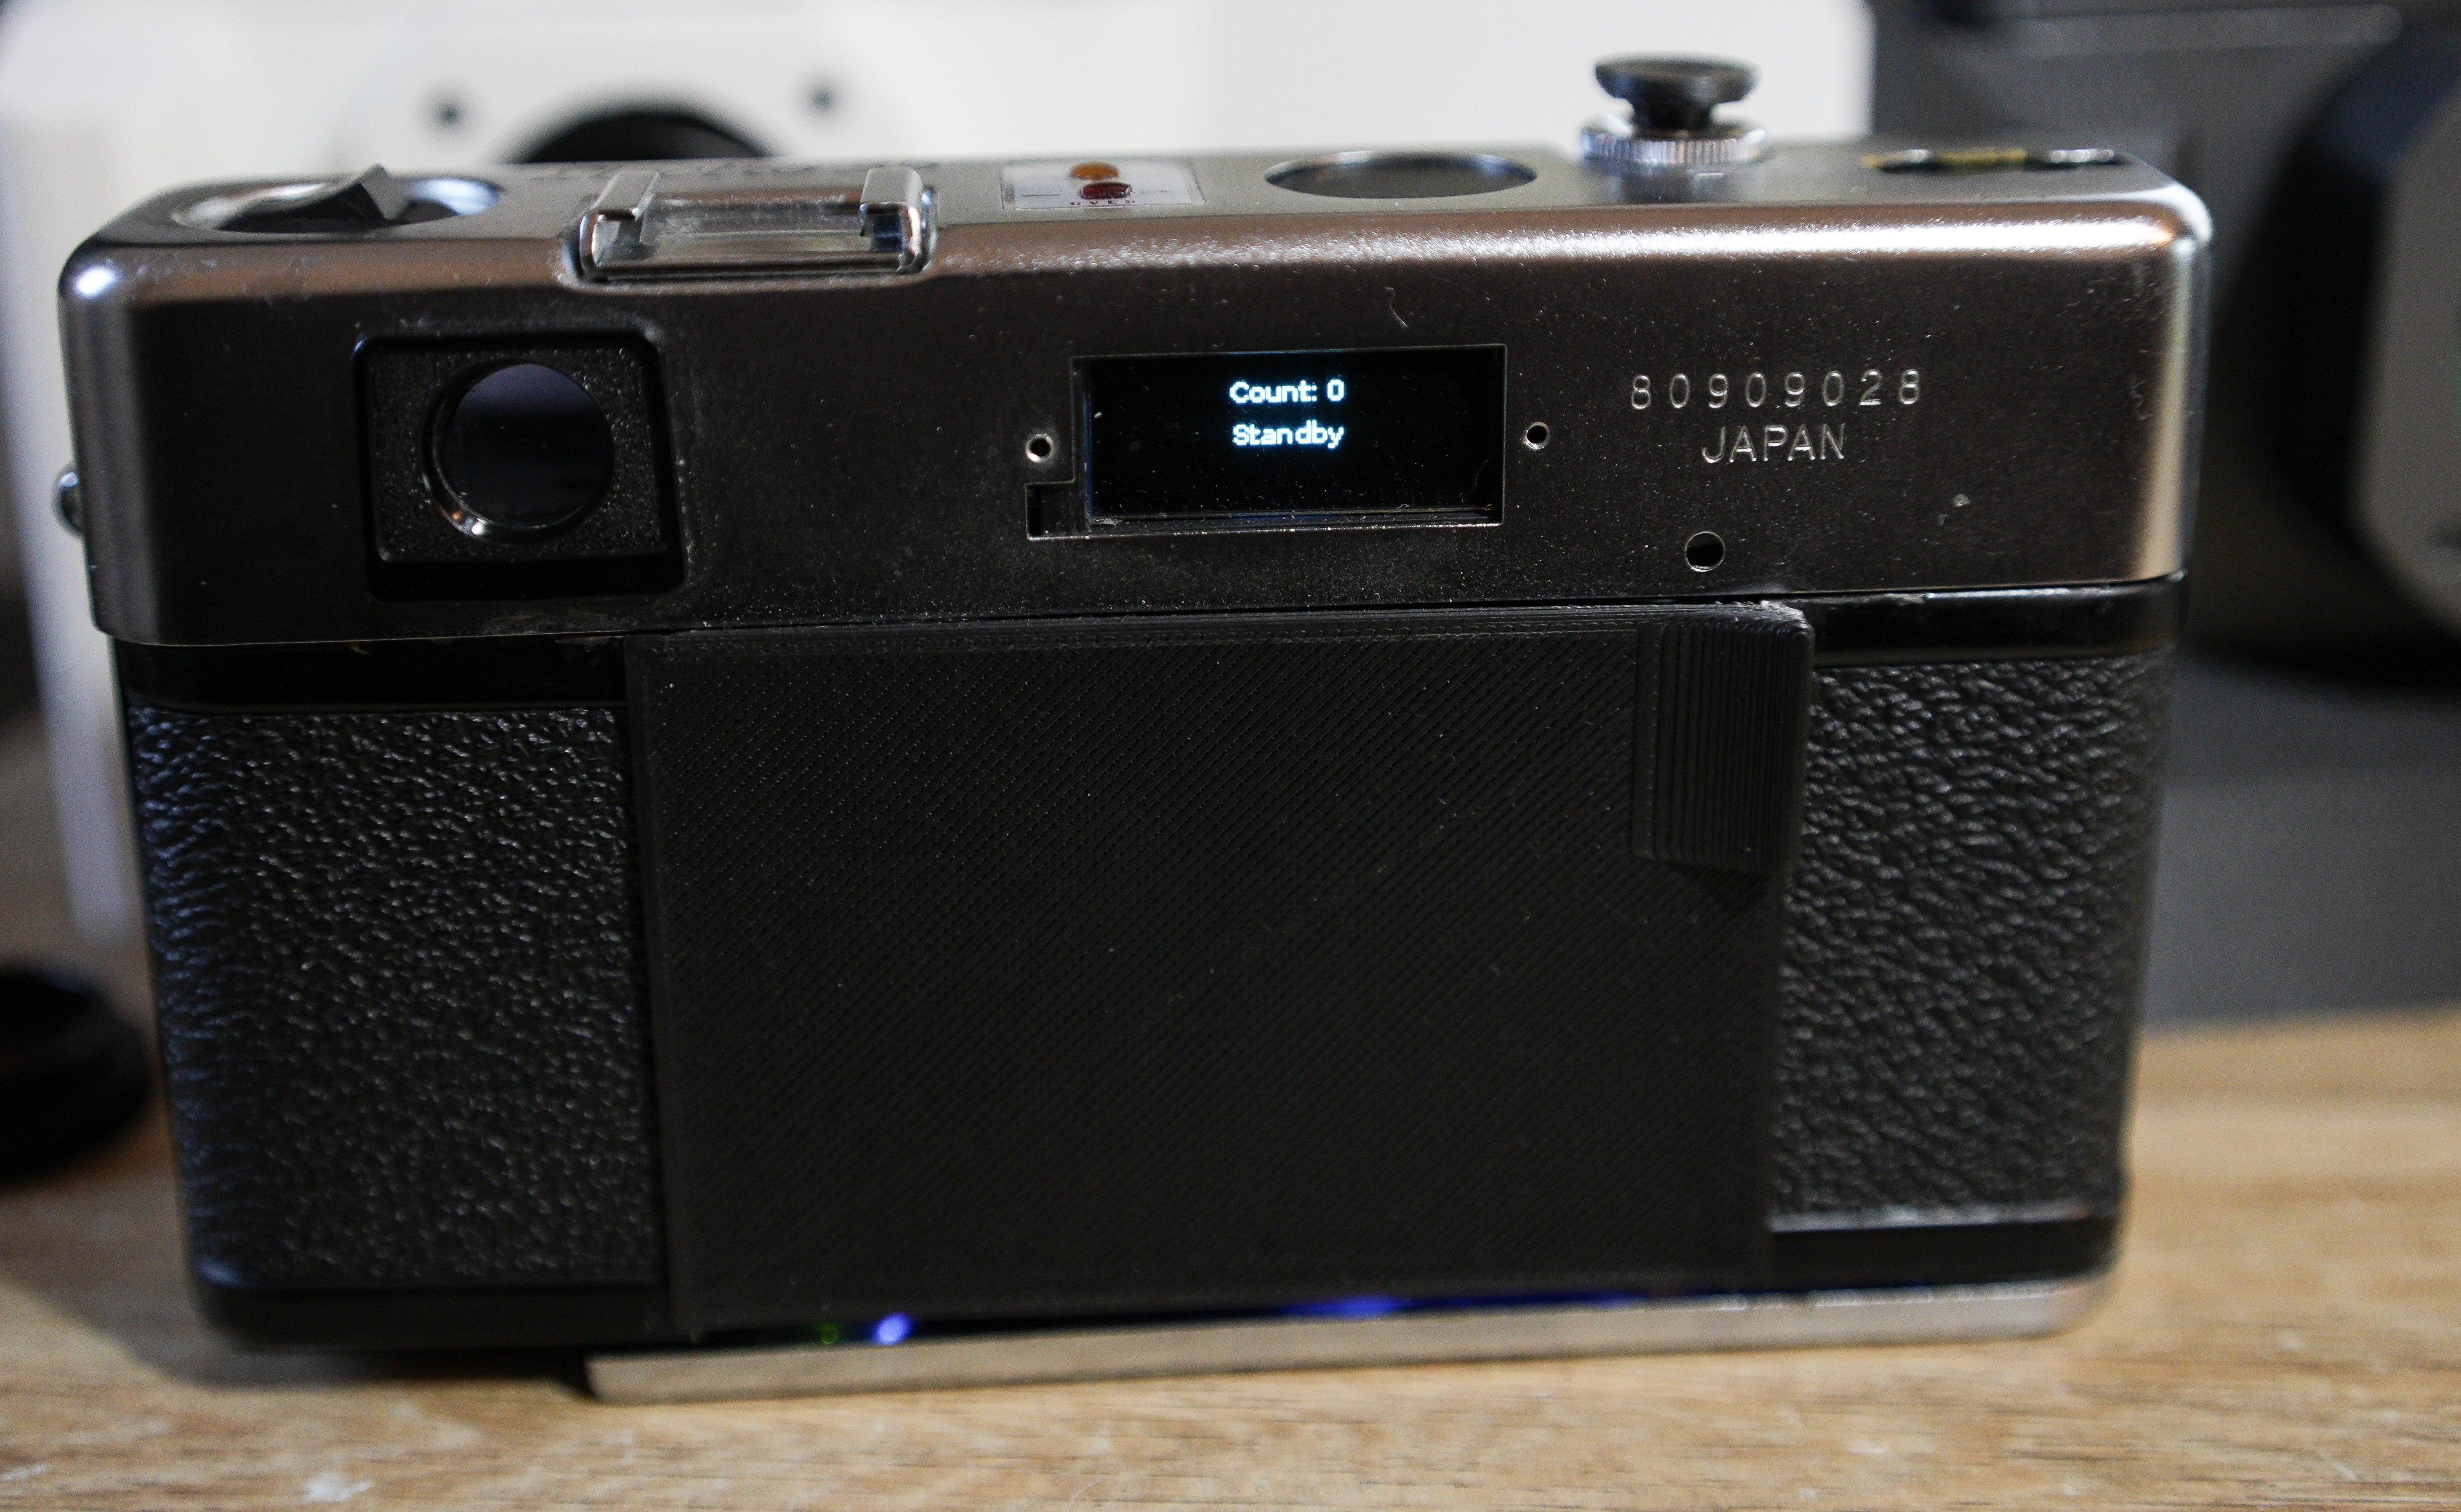
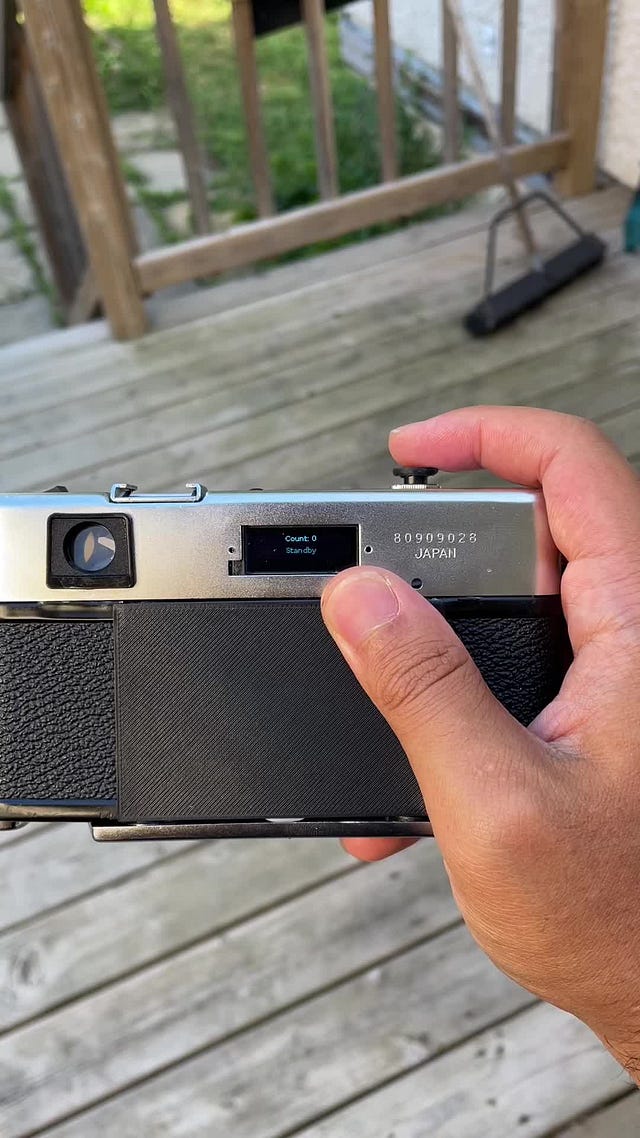
Flip the switch, and the screen displays “Standby”. Behind the scenes, the camera app is already running and waiting for your input.
2. Compose Your Shot
Use the original optical viewfinder to frame your image. The focal length closely matches the original lens setup, so what you see is what you get.
3. Capture
Press the shutter button and the display reads “Capturing.” The camera auto-focuses, sets exposure, captures the image, and writes a RAW file to internal memory. Once done, the image counter ticks up by one.
4. Power Off
Hold the shutter button for 5 seconds to initiate a safe shutdown.
5. Retrieve Your Images
When you’re back home, power the camera on—it automatically connects to WiFi, allowing you to SSH or SFTP in to grab your photos.
6. RAW Format
All files are saved as DNG RAW, perfect for post-processing.
7. Charging
The internal battery charges via USB-C. Simple and convenient.
Image Quality
Out-of-camera, the black-and-white infrared images already have a ton of character. But with a bit of editing, the contrast and surreal tones really come to life. I love the stark, otherworldly vibe this setup creates. Check out the gallery for sample photos!


TikTok Love
This build has gotten a lot of attention over on TikTok! I've shared behind-the-scenes videos showing how it works and the types of shots it produces.
 Tiktok failed to load.
Enable 3rd party cookies or use another browser
Want to Build Your Own?
To take on this project, you'll need to be comfortable with:
Disassembling a film camera
Cutting metal
Soldering
3D printing
Writing and editing Python code
I used a Yashica Electro 35 film body, but you can modify any camera body that fits your style—as long as you clear enough space inside for the Pi, camera module, and battery.
Recommended Parts (Amazon-friendly)
Heads up: I’ve included Amazon affiliate links below. If you decide to grab something using one of these links, it helps support my builds (at no extra cost to you). Appreciate it!
Raspberry Pi Zero 2W (with headers): https://amzn.to/4lx00oe
The Zero keeps things lightweight and low-power.Raspberry Pi Camera 3 NOIR: https://www.pishop.ca/product/raspberry-pi-camera-module-3-noir/
Essential for capturing IR light.720nm IR Lens Filter: https://amzn.to/44yhPwv
Rocker Switch: https://amzn.to/4lzTP2V
For turning the camera on/off.Shutter Button: https://amzn.to/3TSvrgY
Momentary push button.Battery: https://amzn.to/40yrp0Z
I used a LiPo battery with a 5V buck converter.
Alternatively, the PiSugar battery module is a cleaner, solder-free solution I’ve had great success with.i2c Display: https://amzn.to/40tzeVK
OLED display
3D Printing + STL Files
You’ll need to design or modify a mount for your camera body. There are plenty of Pi Camera 3 mounts on Thingiverse to use as a starting point.
If you'd like the STL for the shutter button cap I used, I can share that too—just drop a comment or reply.
Python Code
Here’s the code that powers the camera app. It’s not fully polished, but it works reliably!
import os
import time
from gpiozero import Button
from PIL import Image, ImageDraw, ImageFont
import board
import digitalio
import adafruit_ssd1306
import subprocess

# Set up GPIO using gpiozero
button = Button(26)  # We'll handle the hold time in the code

# Initialize counter
count = 0
capturing = False  # Flag to track if a capture is in progress

# Define the Reset Pin for OLED
oled_reset = digitalio.DigitalInOut(board.D4)

# Use for I2C
i2c = board.I2C()
oled = adafruit_ssd1306.SSD1306_I2C(128, 32, i2c, addr=0x3C, reset=oled_reset)

# Clear the display
oled.fill(0)
oled.show()

# Create a blank image for drawing
image = Image.new('1', (oled.width, oled.height))

# Get drawing object to draw on image
draw = ImageDraw.Draw(image)

# Load a font with size 10
try:
    font = ImageFont.truetype("/usr/share/fonts/truetype/dejavu/DejaVuSans.ttf", 10)
except IOError:
    font = ImageFont.load_default()

# Function to update the OLED display
def update_display(status, error=False):
    global count
    # Clear the image
    draw.rectangle((0, 0, oled.width, oled.height), outline=0, fill=0)

    # Display the count on the first line
    text1 = f"Count: {count}"
    text1_width, text1_height = draw.textsize(text1, font=font)
    x1 = (oled.width - text1_width) // 2
    y1 = 0

    # Display the status on the second line
    text2 = status
    text2_width, text2_height = draw.textsize(text2, font=font)
    x2 = (oled.width - text2_width) // 2
    y2 = 16

    # Display the error message on the third line, if applicable
    text3 = "Error" if error else ""
    text3_width, text3_height = draw.textsize(text3, font=font)
    x3 = (oled.width - text3_width) // 2
    y3 = 32

    draw.text((x1, y1), text1, font=font, fill=255)
    draw.text((x2, y2), text2, font=font, fill=255)
    draw.text((x3, y3), text3, font=font, fill=255)

    # Display image on OLED
    oled.image(image)
    oled.show()

# Function to capture an image using libcamera-still
def capture_image():
    global count, capturing
    if capturing:
        return  # If already capturing, do nothing
    capturing = True

    count += 1
    # Generate a unique filename using the current date and time
    timestamp = time.strftime('%d%m%y%H%M%S')
    dng_filename = f"/home/pi/images/capture_{timestamp}.dng"

    # Capture a DNG image with noise reduction disabled and immediate capture
    update_display("Capturing")  # Display "Capturing" only during the capture phase
    dng_command = f"sudo libcamera-still --immediate --raw --output {dng_filename} --autofocus-mode auto --nopreview --denoise off"

    # Execute the DNG command and capture any errors
    dng_result = subprocess.run(dng_command, shell=True, capture_output=True, text=True)

    if dng_result.returncode == 0:
        print(f"DNG image captured: {dng_filename}")
        update_display("Standby")  # Set the display back to "Standby" after capture
    else:
        print(f"Error capturing image: {dng_result.stderr}")
        update_display("Error", error=True)

    capturing = False

# Function to handle shutdown
def shutdown_pi():
    update_display("Shutdown")
    time.sleep(1)
    os.system("sudo shutdown now")

# Attach the button press event
def handle_button_press():
    global capturing
    start_time = time.time()
    while button.is_pressed:
        if time.time() - start_time >= 3:
            shutdown_pi()
            return
        time.sleep(0.1)

    # If button is released after a minimum of 0.2 seconds, capture the image
    if not capturing and (time.time() - start_time) >= 0.2:
        capture_image()

button.when_pressed = handle_button_press  # Handle button press for capturing and shutdown

# Initial display update to Standby
update_display("Standby")

try:
    # Keep the script running to detect button presses
    while True:
        time.sleep(0.1)
except KeyboardInterrupt:
    pass
Limited Batch Coming Soon
Film cameras are only getting more rare (and expensive), so I’ll only be converting a small number to sell. If you’re interested, stay subscribed—I'll announce future drops here.
This was one of the most fun builds I’ve done, and it’s even more fun to shoot with. More soon.
— Malcolm
I love infrared, and have been shooting it since film days. I did have a small digital that I converted but it wasn't the same. This looks amazing the image quality out of it looks much better than the camera I had converted.
Please let me know when you start producing them