
Build Guide - Mini Hasselblad Style Camera

Thank you to everyone for the positive feedback on this build! I honestly started it just for fun and didn’t expect so many people to be interested. The idea first came to me in early August, and after about 10–12 hours of tinkering I had it working.
Lessons Learned (so you don’t have to)
Before diving into the build, here are a couple things I discovered the hard way:
Steel PLA is conductive → I fried a Raspberry Pi because it shorted out on the steel case.
Soldering directly to Pi pins = pain → Wire wrapping is surprisingly simple and works great for GPIO.
The Camera in Action
If you haven’t seen it yet, here are a couple quick videos showing the camera working:
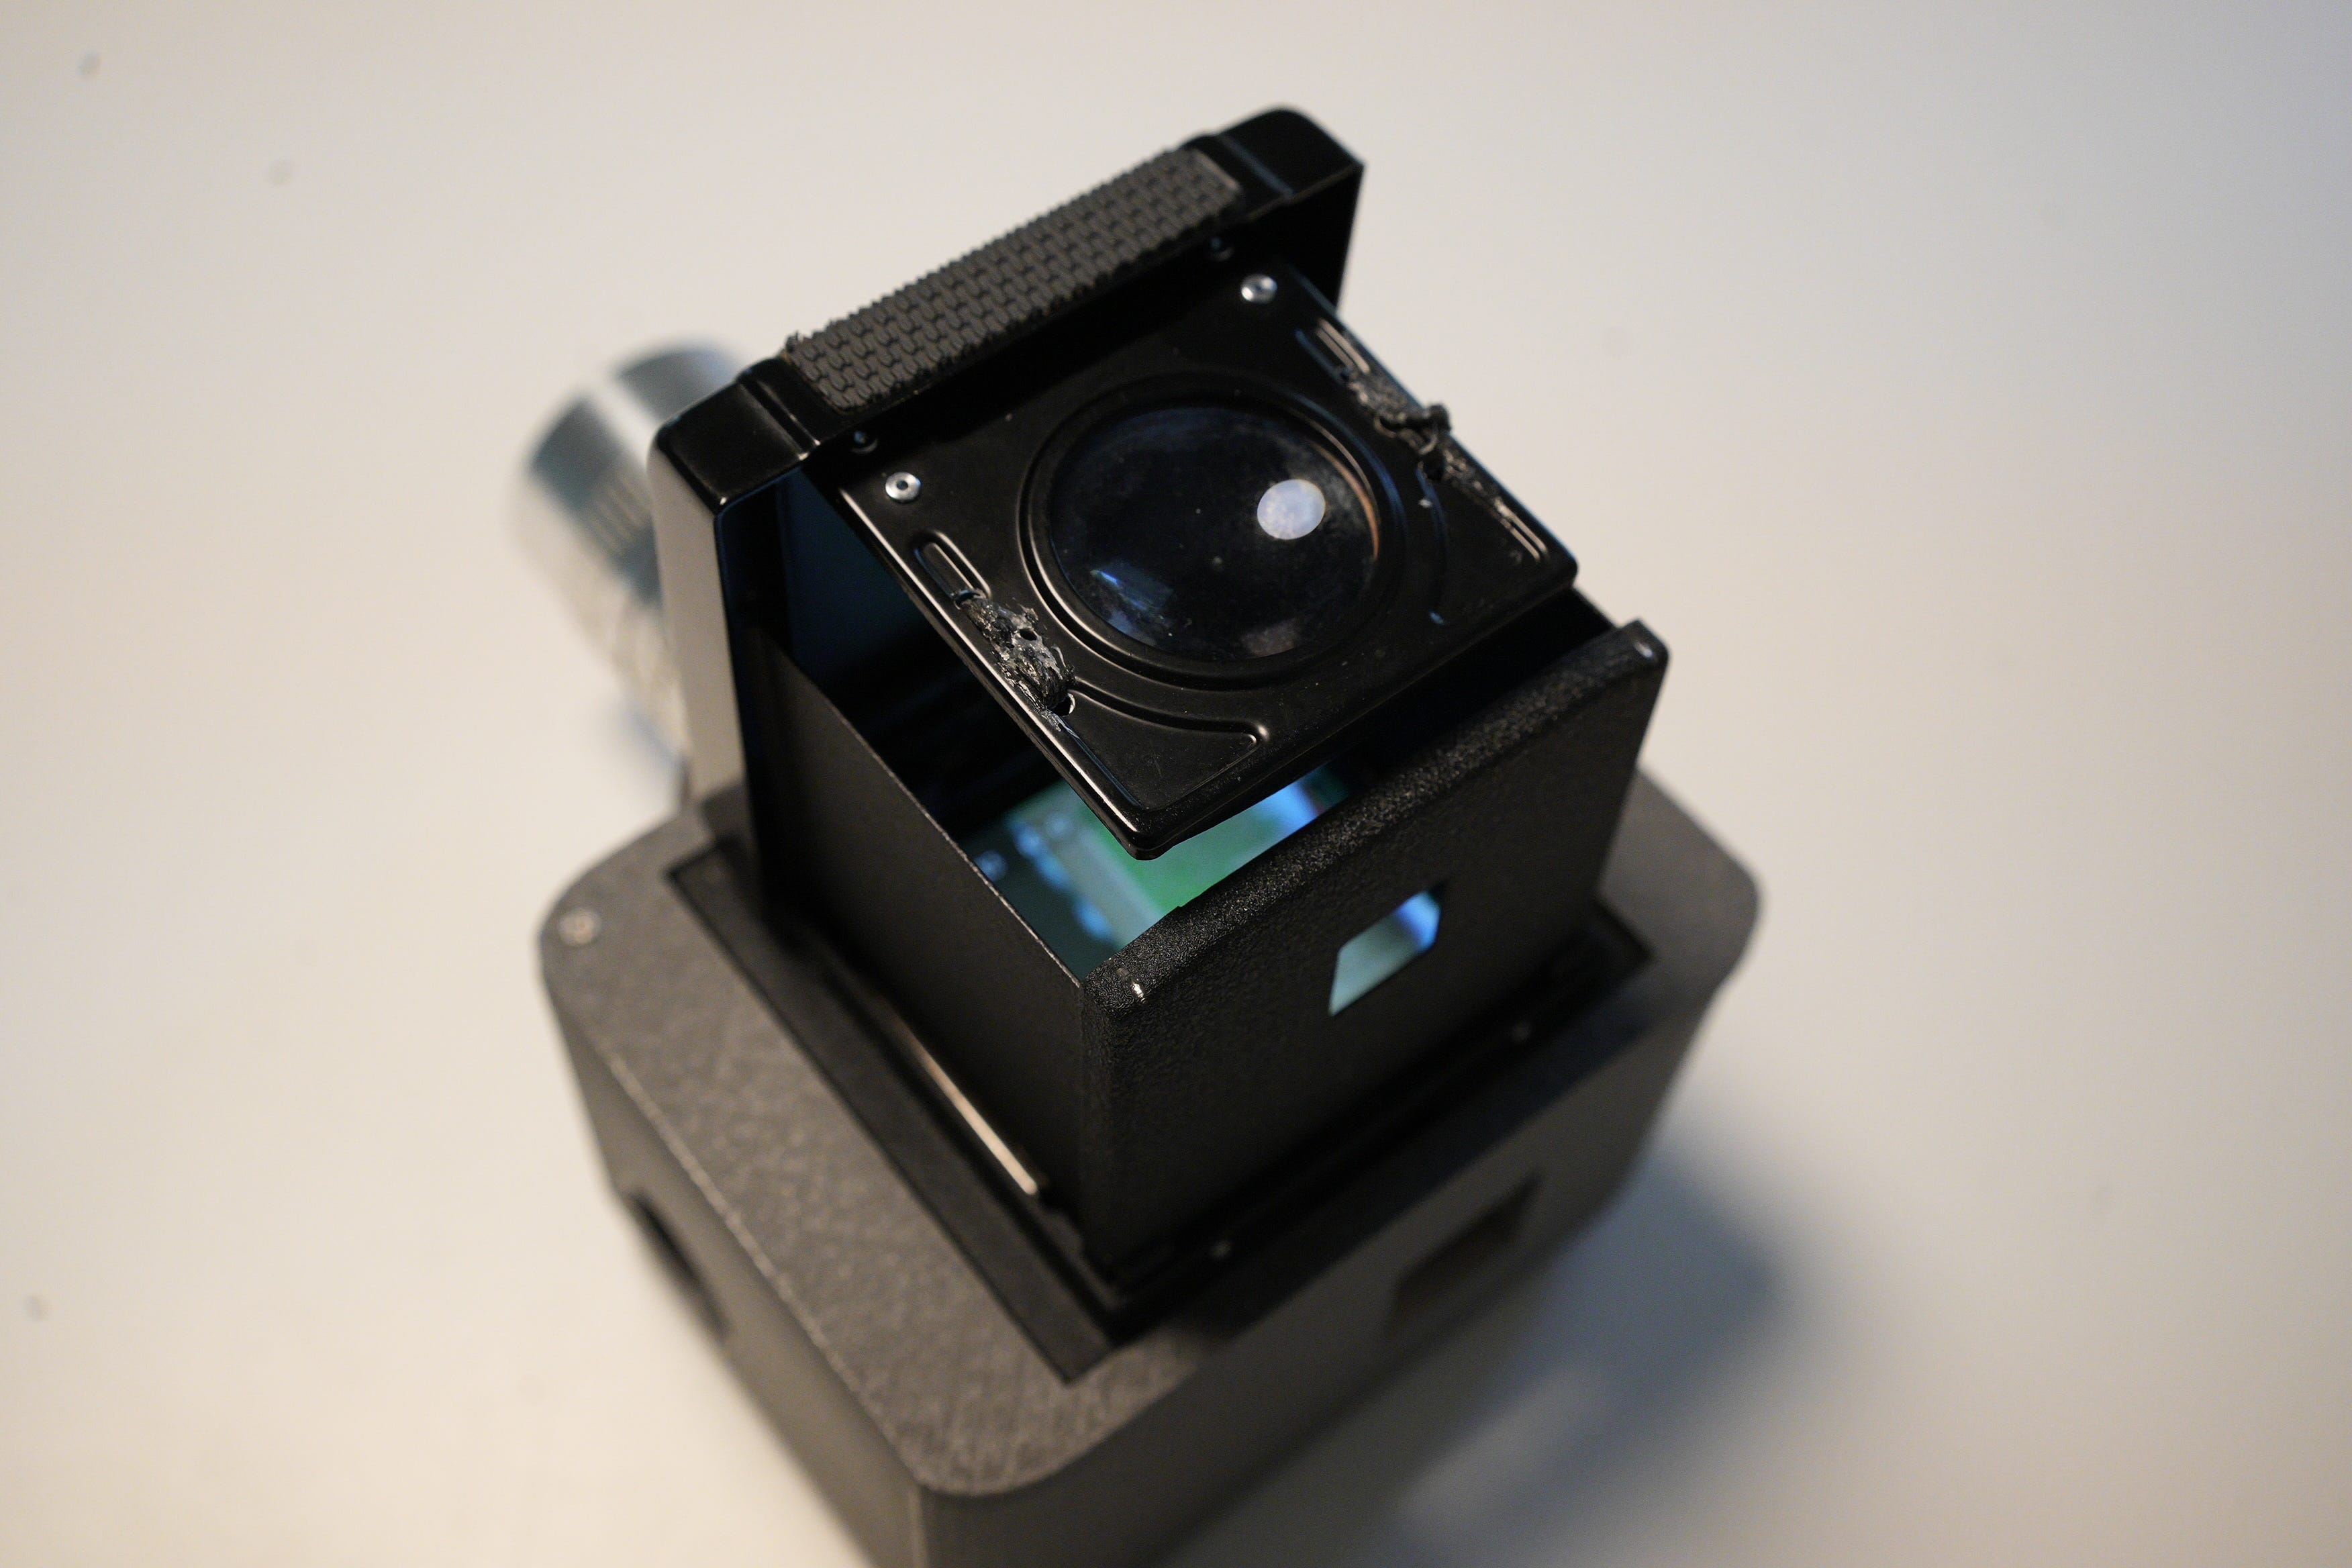
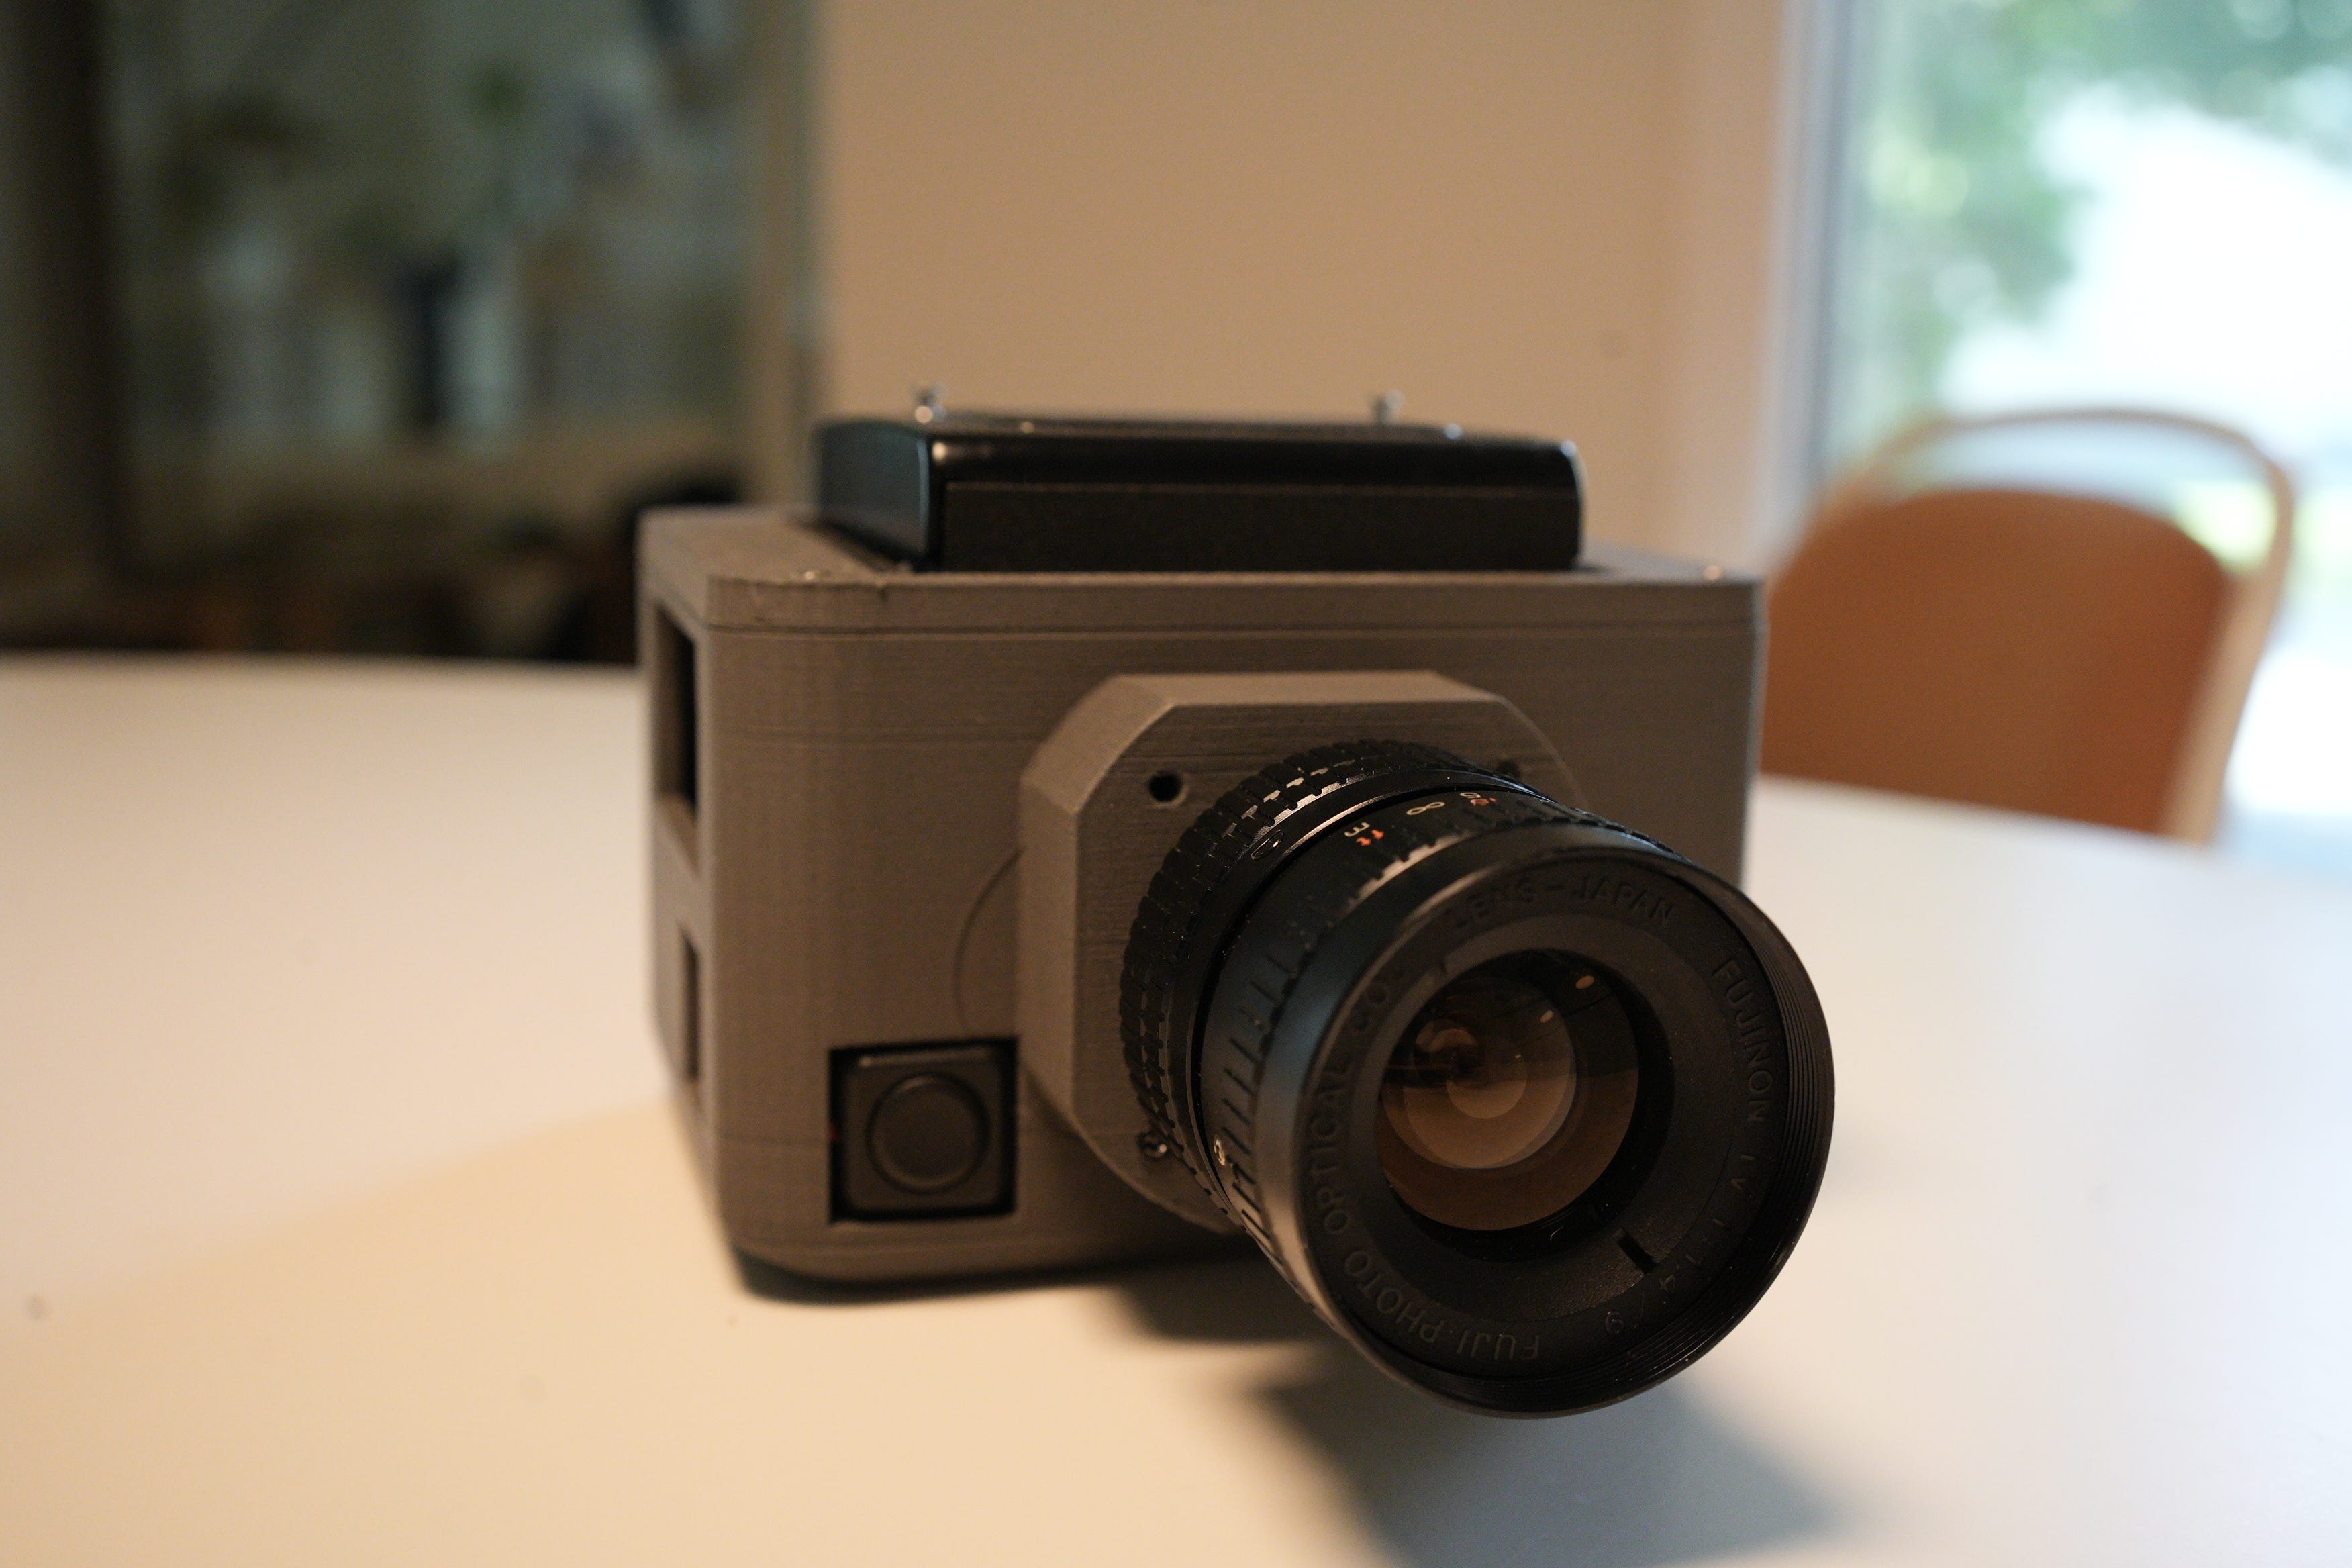
At a high level, it’s a waist-level viewfinder camera built around a Raspberry Pi 5, a Sony IMX283 one-inch sensor, and a Mamiya C220 TLR viewfinder
Key Features
PNG image capture
Wi-Fi image transfer
Focus peaking
Histogram
Shutter speed control
Auto ISO

Bill of Materials
(affiliate links included to help support this page)
Geekworm X1200 Battery (w/ 2× 18650 cells)
The Build
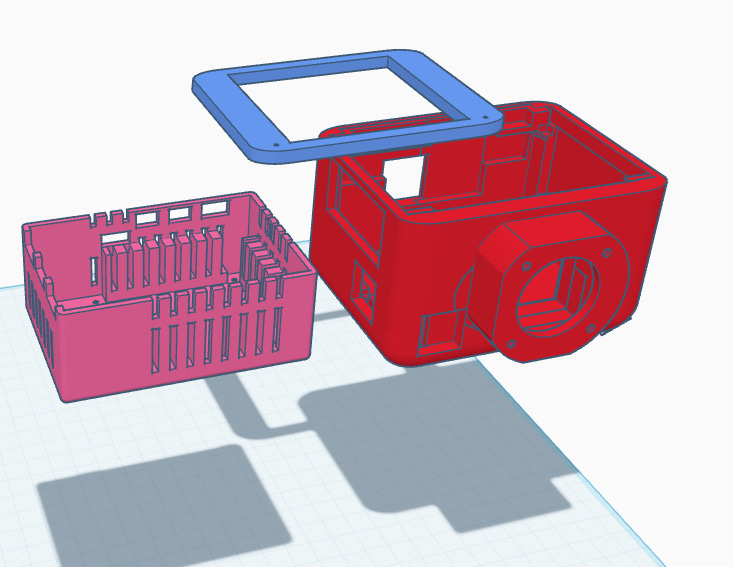
Body
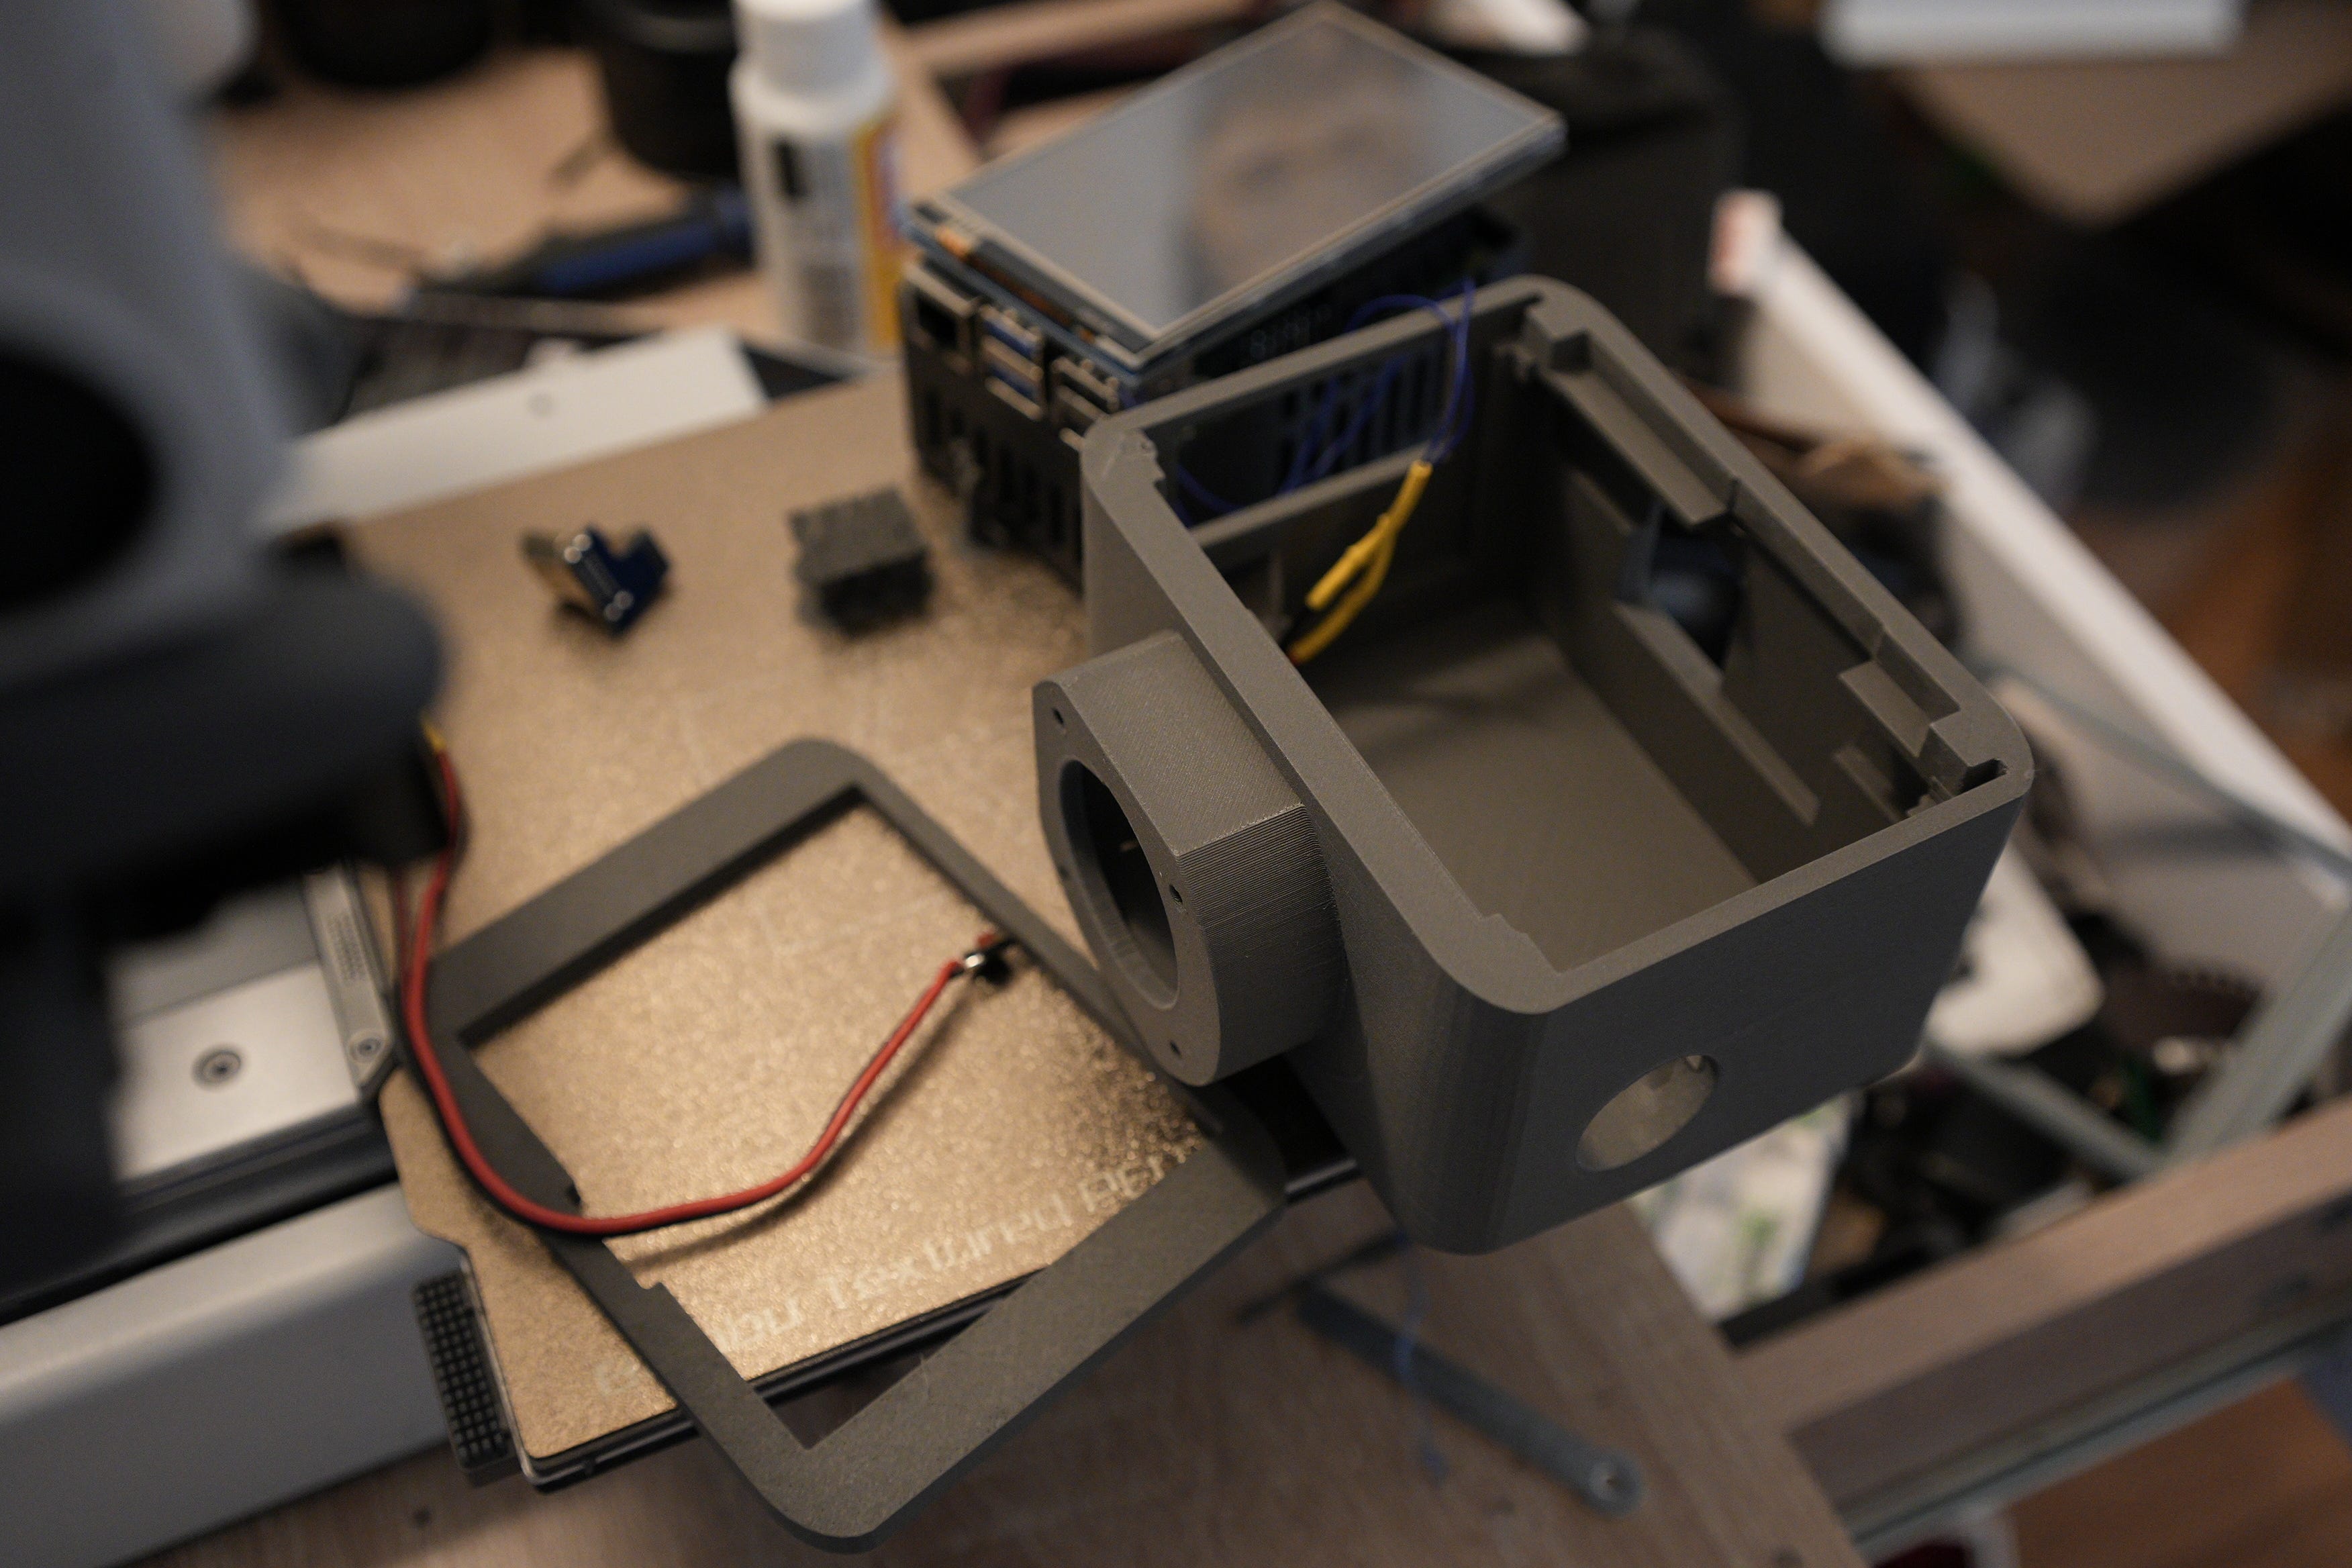
I went with Protopasta Steel PLA for the outer shell — it has a unique metallic look that’s tough to capture in photos but feels different in hand compared to regular PLA. Since the case is conductive, I actually printed a second inner case in standard PLA to isolate the Pi, then enclosed that in the steel outer shell.
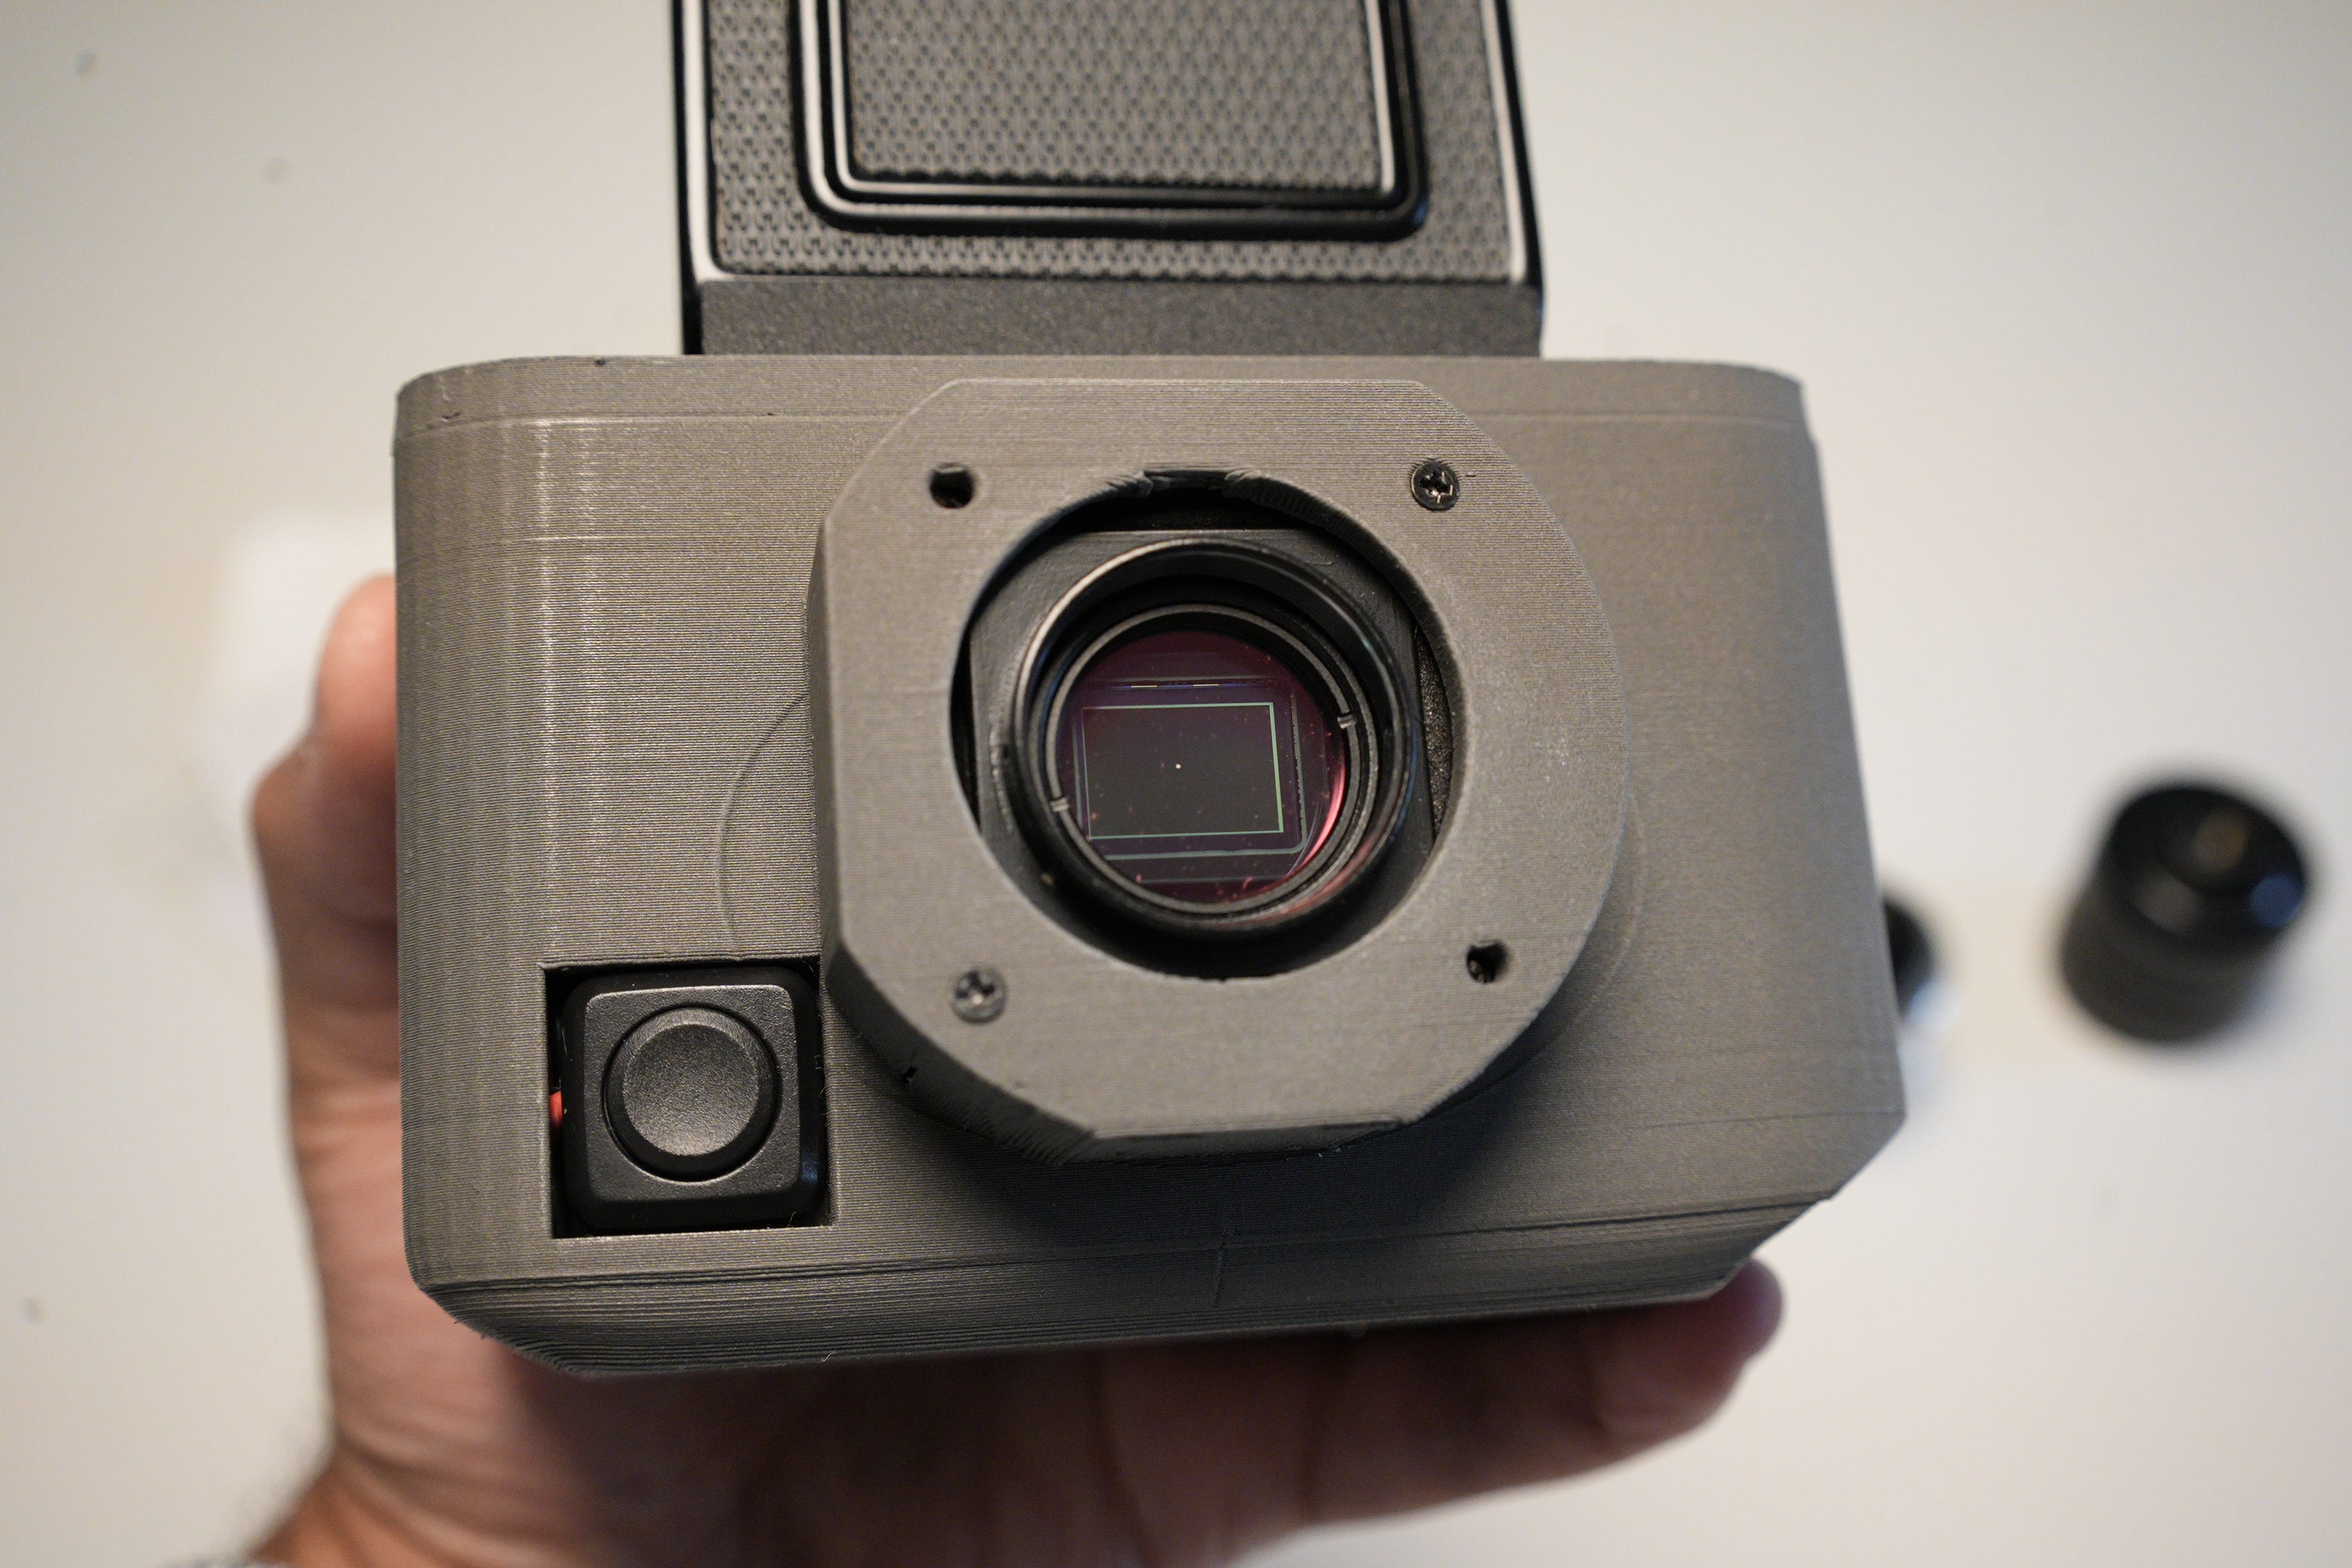
The top panel holds the viewfinder in place, secured with self-tapping M2 screws.
After printing, I lightly sanded the body with 1000 and 2000 grit sandpaper.
Processing Unit
At the core is a Raspberry Pi 5 powered by a Geekworm X1200 battery module. I wired a momentary switch to GPIO pin 26 for the shutter release. The 4" HDMI display gives a clean live view.

Sensor
Instead of the default Pi sensors, I used the 1" Sony IMX283 sensor. The low-light performance and detail are a big leap up from the Pi HQ camera.
Lenses
For glass, I stuck with Fujinon TV C-mount lenses (25mm f/1.4 and 9mm f/1.4). I had them from previous Pi HQ builds and they performed beautifully on this build.
Step-by-Step Build Guide
3D print the three STL files for the case.
Mount the momentary switch to the outer case.
Assemble the X1200 + Raspberry Pi 5 in the inner case (hot glue to base for stability).
Wire-wrap or solder the switch to GPIO26 + GND.
Connect the ribbon cable to the IMX283 sensor and mount it in the outer case.
Attach ribbon to the Pi’s Cam0 port, then install the display.
Fix the inner case into the outer shell (Mod Podge or light adhesive works).
Screw on the top panel.
Friction-fit the Mamiya viewfinder into place.


STL Files
**License Notice**
These STL files are for personal use only. You’re welcome to print and experiment, but they can’t be resold, redistributed, or used commercially. Commercial rights remain with me, Malcolm-Jamal Wilson.
(Full license: Creative Commons Attribution–NonCommercial–ShareAlike 4.0)
Code
The camera runs on a custom Python script that ties everything together — shutter control, image saving, focus peaking, and more.
Code Link: https://docs.google.com/document/d/10cZagIZ1ia9TFyR47FL_WH87innTge-DSVrnK0qf3IA/edit?usp=sharing
Thanks again for following along!

— Malcolm